Mesh API v2 の罠

今更ながらに Mesh API v2 と呼ばれるものを触ってみたけど、初っ端から罠に引っかかった。

v2 では、頂点データの配列を別々に渡すのではなく、インターリーブされたものとして渡す。なので、一つの頂点データがどういう構造になっているかを伝えてやらねばならないのだが、以下はダメ。

1
2
3
4
5
6
7
8
9
10
11
12
13
14
15
16
17
18
[System.Runtime.InteropServices.StructLayout(System.Runtime.InteropServices.LayoutKind.Sequential)]
struct Vertex
{
public Vector3 BeginPos;
public Vector3 EndPos;
public Vector4 Adjuster;
public Color Color;
public Vector3 Normal0;
public Vector4 Normal1;
}
public static VertexAttributeDescriptor[] Layout = new[]{
new VertexAttributeDescriptor(VertexAttribute.Position, VertexAttributeFormat.Float32, 3),
new VertexAttributeDescriptor(VertexAttribute.TexCoord0, VertexAttributeFormat.Float32, 3),
new VertexAttributeDescriptor(VertexAttribute.TexCoord1, VertexAttributeFormat.Float32, 4),
new VertexAttributeDescriptor(VertexAttribute.TexCoord2, VertexAttributeFormat.Float32, 4),
new VertexAttributeDescriptor(VertexAttribute.Normal, VertexAttributeFormat.Float32, 3),
new VertexAttributeDescriptor(VertexAttribute.Tangent, VertexAttributeFormat.Float32, 4),
};

何故か。

一日悩んで、諦めた。と言うのも、使っていた場所が Runtime ではなく、Editor 拡張だったから。

Asset としての Mesh をいじる場合は、シリアライズしたりする必要もあって、従来の API を使うべきなのでは?と思ったのだ。マニュアルにそうしろとは書いてなかったが(伏線)。

飯食って、そろそろ寝るかと落ち着いた時に、「まさか」と思って試したらうまくいったのが次のコード。

1
2
3
4
5
6
7
8
9
10
11
12
13
14
15
16
17
18
[System.Runtime.InteropServices.StructLayout(System.Runtime.InteropServices.LayoutKind.Sequential)]
struct Vertex
{
public Vector3 BeginPos;
public Vector3 Normal0;
public Vector4 Normal1;
public Vector3 EndPos;
public Vector4 Adjuster;
public Color Color;
}
public static VertexAttributeDescriptor[] Layout = new[]{
new VertexAttributeDescriptor(VertexAttribute.Position, VertexAttributeFormat.Float32, 3),
new VertexAttributeDescriptor(VertexAttribute.Normal, VertexAttributeFormat.Float32, 3),
new VertexAttributeDescriptor(VertexAttribute.Tangent, VertexAttributeFormat.Float32, 4),
new VertexAttributeDescriptor(VertexAttribute.TexCoord0, VertexAttributeFormat.Float32, 3),
new VertexAttributeDescriptor(VertexAttribute.TexCoord1, VertexAttributeFormat.Float32, 4),
new VertexAttributeDescriptor(VertexAttribute.TexCoord2, VertexAttributeFormat.Float32, 4),
};
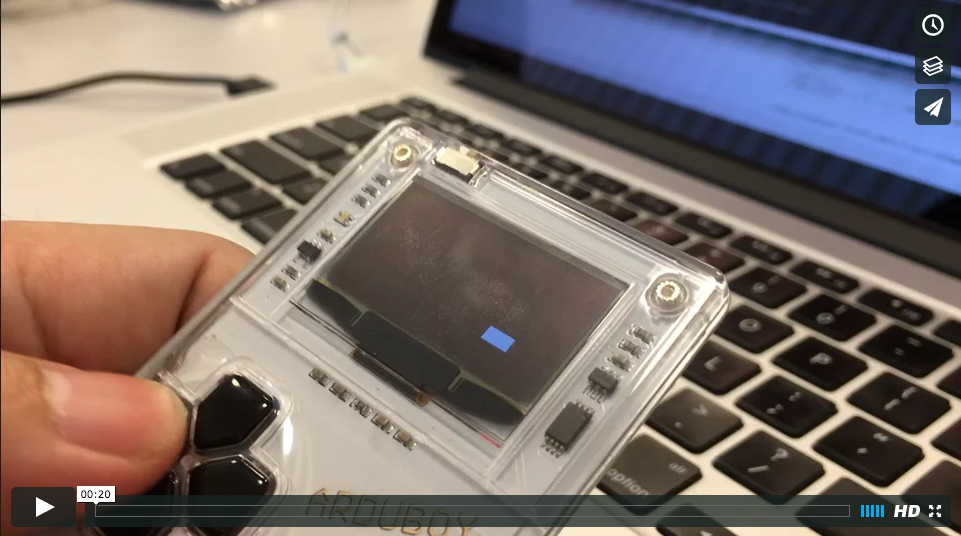
違うのは、 VertexAttribute の順番。これを、おそらく enum VertexAttribute の定義順に合わせた。

それなら最初に言ってくれよ……。マニュアルにそうしろとは書いてなかった(回収)。

まあ、でもこれ、 Unity というより、グラフィックの API 側の都合のような気はする。最近はとんと、直接 API に触れることもなくなったので、「オマエがヌルいだけじゃねーか」と言われれば、「はい」としか(‘A’)

Arduboy で豆腐を動かす

概要

Arduboy で豆腐を動かすまで。

前回までのお話

Arduboy ことはじめ

豆腐とは

キャラの画も無い状態で白い四角形だけ画面上で動かすことを、豆腐を動かすと呼んでいた(要出展)時代があって、それを Arduboy でやろうという話です。

食べれません。

豆腐あれと神は言った

1
2
3
4
5
6
7
8
9
10
11
12
13
14
#include <Arduboy.h>

Arduboy arduboy;

void setup() {
arduboy.begin();
}

void loop() {
if (!arduboy.nextFrame()) return;
arduboy.clear();
arduboy.fillRect(128/2, 64/2, 16, 8, 1);
arduboy.display();
}

前回の使い回しですが、 loop() 内の drawCircle()fillRect() に変わりました。

実行すると、画面の真ん中に豆腐が現れます。

まだ豆腐は動きません。

そんな豆腐で大丈夫か?

豆腐が世界の中心からずれてる……。

fillRect() 関数は、

1
2
3
4
5
6
7
fillRect(int16_t x, int16_t y, uint8_t w, uint8_t h, uint8_t color);
/*
x, y -> 矩形の左上座標
w -> 矩形の幅
h -> 矩形の高さ
color -> 色
*/

となっており、豆腐を世界の中心に持っていく、もしくは中心の座標を指定して豆腐を描画するには、指定する座標から豆腐の幅や高さを考慮してやらねばなりません。

1
2
3
4
5
6
7
8
9
10
11
12
13
14
#include <Arduboy.h>

Arduboy arduboy;

void setup() {
arduboy.begin();
}

void loop() {
if (!arduboy.nextFrame()) return;
arduboy.clear();
arduboy.fillRect(128/2-8, 64/2-4, 16, 8, 1);
arduboy.display();
}

上記のように、XY座標から幅と高さの半分を引いてやります。

これで豆腐が世界の中心に据えられました。

豆腐よ動け

1
2
3
4
5
6
7
8
9
10
11
12
13
14
15
16
17
#include <Arduboy.h>

Arduboy arduboy;

void setup() {
arduboy.begin();
}

short x = 0; // 変数を用意

void loop() {
if (!arduboy.nextFrame()) return;
arduboy.clear();
arduboy.fillRect(x-8, 64/2-4, 16, 8, 1); // X座標を用意した変数に置き換える
arduboy.display();
x = x + 1; // xに1を足す
}

変数が出てきます。

setup() 関数は、起動後一回だけ呼ばれます。 loop() 関数はその名の通り、決められた時間毎に呼ばれます。よって、 loop() 関数が呼ばれる度に x に 1 を足し続けているのが上記のコードになります。

実行すると、左から右へ豆腐が高速移動します。ただし、豆腐が戻ることはありません(実際には数百秒後、豆腐は宇宙の端に到達し、反対側から戻ってきます)。

豆腐よ我が声を聞け

1
2
3
4
5
6
7
8
9
10
11
12
13
14
15
16
17
#include <Arduboy.h>

Arduboy arduboy;

void setup() {
arduboy.begin();
}

short x = 128/2; // 横座標
short y = 64/2; // 縦座標

void loop() {
if (!arduboy.nextFrame()) return;
arduboy.clear();
arduboy.fillRect(x-8, y-4, 16, 8, 1); // X座標を用意した変数に置き換える
arduboy.display();
}

ついでに縦の座標も変数にしてみました。ですが、まだ豆腐は動きません。

豆腐を自由自在に動かすには、 Arduboy に搭載されているボタンからの入力を受け取る必要があります。

1
2
3
4
5
6
7
8
9
10
11
12
13
14
15
16
17
18
19
20
21
22
23
24
25
26
27
28
29
#include <Arduboy.h>

Arduboy arduboy;

void setup() {
arduboy.begin();
}

short x = 128/2; // 横座標
short y = 64/2; // 縦座標

void loop() {
if (!arduboy.nextFrame()) return;
if (arduboy.pressed(UP_BUTTON)) {
y -= 1;
}
if (arduboy.pressed(DOWN_BUTTON)) {
y += 1;
}
if (arduboy.pressed(LEFT_BUTTON)) {
x -= 1;
}
if (arduboy.pressed(RIGHT_BUTTON)) {
x += 1;
}
arduboy.clear();
arduboy.fillRect(x-8, y-4, 16, 8, 1); // X座標を用意した変数に置き換える
arduboy.display();
}

arduboy.pressed(ボタン名) でそのボタンが押されているかどうかを取得出来ます。それに応じて座標を増減します。

Screen Shot 2016-06-05 at 15.27.05.png
moving tofu

豆腐が世界の中を動けるようになりました。

Arduboy のOLEDを叩く

概要

OLED に直接制御コマンドを流し込みます。

今回はあまり実用的でも初心者向けでもありません。

ハードウェア的な話

OLED の型番

https://github.com/Arduboy/Arduboy/blob/master/src/core/core.h#L112

分解しなくてもライブラリに書いてあったのですぐわかりました。

OLED のデータシート(マニュアル)

https://cdn-shop.adafruit.com/datasheets/SSD1306.pdf

英語ですが、マニュアルがありました。

ソフトウェア的な話

コマンドの送り方

ArduboyCore クラス( Arduboy クラスのベースクラス )に、関数があります。

1
2
3
void static LCDDataMode(); //< put the display in data mode
void static LCDCommandMode();
void static sendLCDCommand(uint8_t command);

名前についてツッコむのは野暮ってもんです。

  • LCDDataMode() は OLED の受信モードを、表示データを受信するモードにします
  • LCDCommandMode() は OLED の受信モードを、制御コマンドを受信するモードにします
  • sendLCDCommand() は、上記二つを自動で発行し、その間に 1byte の制御コマンドを送信する便利関数です
1
2
3
4
5
6
void ArduboyCore::sendLCDCommand(uint8_t command)
{
LCDCommandMode();
SPI.transfer(command);
LCDDataMode();
}

コアライブラリは、常に表示データ受信モードになっている前提で作られているので、受信モードを変更したあとは必ず戻すようにしておきます。

試しに送ってみる

コントラストを変更するコマンドを発見したので、試しに送ってみます。

1
2
3
4
5
6
7
8
9
10
11
u8 c = 0;
void loop() {
if (!boy.nextFrame()) return;
boy.clear();
boy.fillScreen(1);
boy.display();
boy.LCDCommandMode();
SPI.transfer(0x81);
SPI.transfer(c++);
boy.LCDDataMode();
}

setup() 関数等は省略しますが、上記のソースでコントラストを 0〜255 に変化しま……す?

確かに変化はしましたが、真っ暗までにはならず、また階調も三階調ほどしか変化しないようでした。残念。フェードイン・フェードアウトに使えるかと思ったのですが('ω`)

おわり

データシートを読むと他にも色々面白そうな制御コマンドがあるので、色々試してみると面白いかもしれません。